Mounting Rails: Where Crews Actually Bolt to Your Roof
The first morning of install, most homeowners watch panels appear and assume the hard roof work is already done. By then the rail line is set, the feet are sealed, and any foot that missed a rafter is buried under aluminum you will not see again for years.

Why the Rail Layout Matters More Than Panel Count
Panels get the attention because they are visible from the street. The structural work happens earlier, when a crew snaps a chalk line and starts drilling lag bolts through shingles into whatever is below. Each bolt passes through a mounting foot — a small bracket that spreads load and holds the rail. If that foot lands on plywood sheathing instead of a rafter, the bolt may hold on day one and loosen after a few hot summers when the roof flexes.
A loose foot rarely shows up as a panel problem. It shows up as a wobbly rail section, a squeak during wind, or a leak at a penetration that shifted a fraction of an inch. By then the array covers the layout and a fix means removing hardware.
How Crews Locate Rafters on a Shingle Roof
On a typical asphalt shingle roof, rafters sit 16 or 24 inches on center. Experienced crews find them by feel and sound: a stud finder, tap tests, or marks from prior work like satellite dish mounts. Some crews pull a shingle tab at the eave to confirm spacing before committing to a full rail run.
The rail does not need a foot on every rafter, but spacing rules from the mounting manufacturer set maximum spans between attachments. A crew racing to beat weather may stretch that span on the last bay of the day. That bay is worth watching if you can see it before panels cover it.
A foot that lands on sheathing alone can feel solid when the installer torques the bolt. The test is what happens after the roof heats and cools a few dozen times — that is when plywood crush and bolt creep show up.
What a Foot Does and Where It Should Land
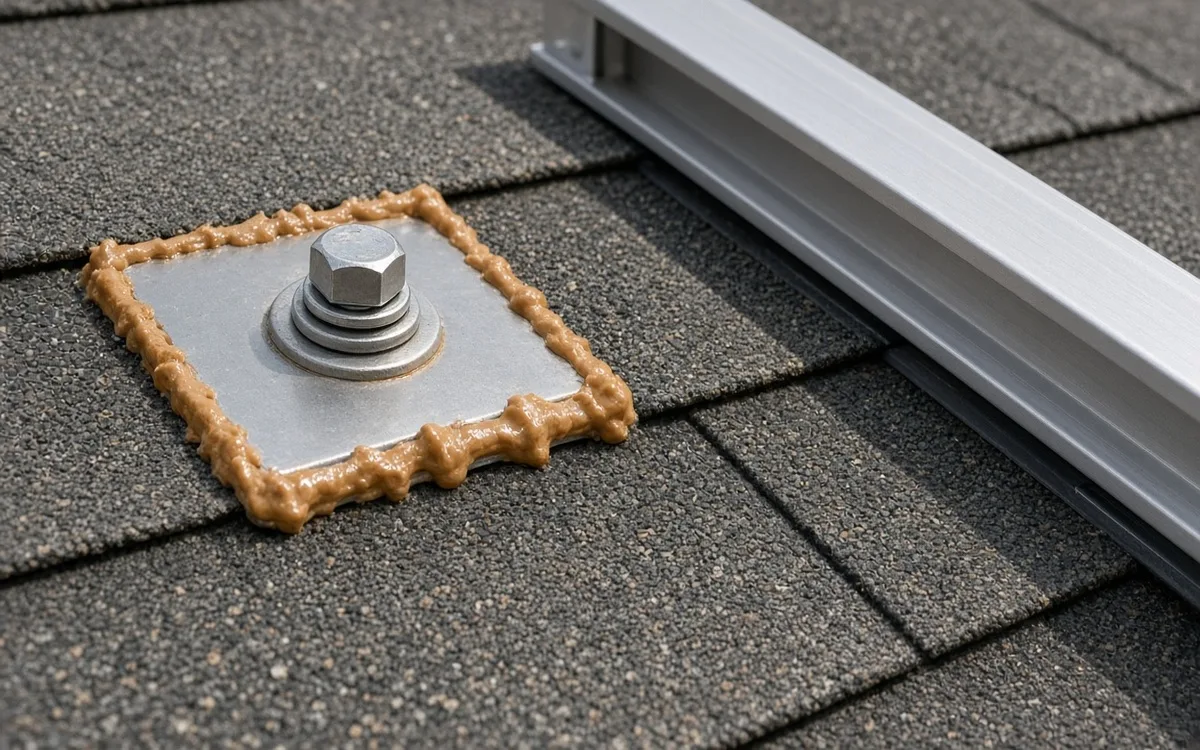
The foot sits under the rail and above the shingle. A lag bolt passes through both and bites into the rafter. Flashing or a seal plate wraps the penetration so water cannot follow the bolt hole. When alignment is right, you see feet in a straight line with consistent spacing and each bolt centered on a rafter crown.
From the ground before panels go up, uneven spacing or feet that sit slightly off the chalk line can mean the crew adjusted for a missed rafter. Signs worth asking about include:
- a foot placed noticeably closer to its neighbor than the rest of the run;
- a bolt hole that looks offset from the rail centerline when viewed from the eave;
- extra sealant piled around one foot compared to others on the same row;
- a short rail section spliced where you would expect one continuous piece.
None of these alone proves a problem, but together they suggest the layout was corrected on the fly. A direct question costs nothing while the rail is still exposed.
When Crews Move the Rail Line
Obstructions force changes: a vent stack, a skylight curb, or a roof valley that splits the array. Crews may shift the entire rail run six inches upslope to keep feet on rafters and still clear the obstacle. That move is normal. What matters is whether they re-verified rafter location after the shift rather than assuming the same spacing still applies.
Tile roofs and older homes with irregular framing add more variables. On those jobs, a layout sketch from the lead installer is more useful than a generic spacing chart. Ask for it while the rail is visible.
What You Can Verify Before Panels Cover the Rails
You do not need to climb the roof. From a ladder at the eave or with binoculars from the yard:
- Confirm feet follow a straight line parallel to the ridge or eave as designed.
- Count feet on the visible run and compare spacing — gaps that break the pattern stand out.
- Ask the lead which rafter spacing the layout assumes and whether any feet required relocation.
- Request a photo of the rail layout before panels go up, especially near vents or valleys.
- Note the foot positions on your own phone so you have a reference if something shifts later.
This takes ten minutes on install morning and can avoid a follow-up visit that might require partial disassembly. Once mid-clamps and panels lock down, the rail geometry disappears until someone removes hardware.
What You Cannot Fix From the Ground
You cannot confirm rafter depth, sheathing thickness, or bolt torque from the lawn. Those belong to the installer and any structural review your project requires. Your role is to catch layout decisions while they are still visible and documented, not to second-guess engineering.
If a foot location looks wrong and the crew dismisses the question, escalate before panels cover the area. After that point, the cost of correction rises because labor means unmounting, not just re-sealing one boot.